What Is the Quickest Way to Check a Bathroom from a Tenant Perspective?
The quickest way to assess a bathroom is to use it as a tenant would: walk through a typical morning routine, notice where you hesitate or reach awkwardly, and separate everyday usability problems from cosmetic wear. This takes only a few minutes, but it can reveal more than a quick glance at the tiles.
For landlords and property managers, the aim is not automatically to plan a full renovation. It is to decide whether a focused refresh will make the room feel cleaner, brighter and easier to use—or whether deeper problems justify a more substantial job. Often, the best improvement is not a new bath or a different layout. It is better lighting at the basin, a well-sized mirror and a few practical fixes that make the space work smoothly.
Start with a morning routine walkthrough
Stand at the bathroom door and imagine entering when you are half-awake, short on time and carrying toiletries. Then physically walk through the room, following the likely sequence: enter, switch on the light, use the toilet, wash your hands, brush your teeth, wash or shower, dry off and leave.
This morning routine walkthrough helps you assess the bathroom as a working space rather than a set of fixtures. It also makes the inspection consistent: you can use the same sequence when comparing bathrooms across a portfolio or checking a room after a tenant reports an issue.
- Enter and close the door. Does it open without hitting the toilet, vanity or towel rail? Is there enough room to move once it is shut?
- Find and use the light switch. Is it easy to locate, and does the room become bright enough straight away?
- Use the basin. Can you see your face clearly? Is there a place to put soap, a toothbrush and other everyday items?
- Use the toilet. Is there clear space in front and beside it? Can you reach toilet roll without twisting awkwardly?
- Use the bath or shower. Is it easy to get in and out? Are the controls reachable, and is there a practical place for shampoo?
- Finish and leave. Is there somewhere to hang a towel? Does the room ventilate, and do wet floors or surfaces create an obvious slip risk?
Do not assess only from your own height or habits. A bathroom may work for one person but feel awkward for a shorter tenant, someone with limited mobility or a household sharing the space. The goal is not to make assumptions about who will live there; it is to identify avoidable barriers and provide clear, everyday usability.
Check the things tenants reach for
During the walkthrough, pay special attention to what is within easy reach. Tenants need somewhere to put toiletries while using the basin or shower, a convenient towel hook, and toilet roll positioned so it can be reached while seated. A room can look tidy in photographs yet be frustrating if there is nowhere to put a toothbrush or hang a hand towel.
- Is there a shelf, ledge or vanity surface near the basin?
- Can you reach the soap and taps without leaning across a wet surface?
- Is there a hook or rail close enough to the shower or bath to avoid dripping across the floor?
- Can a tenant reach the shower controls without standing directly under cold water?
- Is there a safe, dry place for commonly used items, without overcrowding the basin?
Small additions can help, but avoid fixing shelves or accessories into tiled walls without checking what is behind them and how the installation will be sealed. A poorly fitted accessory can create water ingress or damage, turning a minor improvement into a maintenance problem.
Assess lighting at the basin first
Lighting is one of the most noticeable bathroom upgrades because tenants use it every day. A single ceiling light may illuminate the room generally but leave the face in shadow at the basin. That can make shaving, applying make-up, skincare and other close-up tasks unnecessarily difficult.
Check the lighting at the basin at different times if possible. Turn the lights on, look in the mirror and observe whether the face is evenly lit or shadowed from above. Also note whether the mirror is too small, poorly positioned or hard to use for more than one person. A clean, well-proportioned mirror with suitable illumination can make a bathroom feel brighter and more considered without moving any plumbing.
A light-up mirror can be a high-impact refresh, but it needs to be selected and installed properly. Confirm the available wall space, the mirror’s dimensions, the position of the basin and any existing fittings. Check the manufacturer’s installation requirements and have electrical work carried out by a suitably qualified professional. Bathroom electrical work must comply with the applicable UK requirements, including the location of fittings in relation to water and the relevant zones.
Before ordering, try LED Mirror World’s mirror size calculator to help consider a suitable mirror size. LED Mirror World is a product supplier for LED mirrors. Treat a calculator as a planning mirror width vs vanity width aid, not a substitute for measuring the actual wall and checking the product’s dimensions and installation clearances.
Use a paper template before you buy
A simple paper template is a useful way to check a proposed mirror size in the room. Cut paper or cardboard to the mirror’s intended dimensions, then tape it to the wall in the proposed position. Step back, sit or stand at the basin, and check whether it looks balanced and is practical to use.
This paper-template method for marking the mirror outline on the wall helps catch common problems early. You can see whether the mirror will overlap a light fitting, feel too narrow for the basin, sit too high or low, or leave awkward gaps beside a cabinet. Adjust the template before buying anything. A few minutes with paper and tape can prevent a costly return or a last-minute change during installation.
Decide: refresh or full renovation?
Once you have completed the walkthrough, group what you noticed into three categories: function, condition and appearance. This makes it easier to decide whether you are dealing with a maintenance issue, a refresh opportunity or evidence that the bathroom needs a more comprehensive assessment.
What you find Likely next step Examples Room works, but looks tired Targeted refresh Replace a dated mirror, improve basin lighting, renew tired sealant or update accessories Minor usability problems Small practical improvements Add a towel hook, improve storage or reposition an item where appropriate Persistent faults or signs of damage Investigate and repair Leaks, recurring mould, loose fittings, damaged flooring or poor extraction Several systems are failing or unsuitable Consider a larger renovation Widespread water damage, failed plumbing, unsafe electrics or a layout that cannot be used effectivelyA refresh is usually appropriate when the core fixtures are sound, the layout works and the problems are mainly about light, presentation or small conveniences. A full renovation becomes more reasonable when there are significant defects, repeated repairs, water damage, or a layout that creates persistent usability problems.

Do not use appearance alone to decide. Mould, for example, may be linked to inadequate ventilation, a leak, cold surfaces or tenant behaviour, and the cause needs investigating rather than simply painting over it. Likewise, a loose fitting or damaged seal should be assessed and repaired properly, even if the rest of the room looks presentable.
Keep the layout if it already works
When a bathroom is basically functional, keeping the layout is often the quickest and least disruptive route. Moving a toilet, basin or bath can involve changes to plumbing, drainage, electrics, waterproofing, tiling and decoration. That adds trades, cost, coordination and opportunities for delays. A seemingly simple change can become a much larger job once walls or floors are opened up.
Before considering a new layout, ask whether the main complaints can be solved without moving fixed services. Could a better mirror improve the basin area? Would a more suitable shower screen or storage arrangement help? Is the real issue poor lighting, a missing towel hook or a faulty extractor rather than the position of the bath?
Keeping services in place does not mean accepting an unsuitable bathroom. It means testing simpler solutions first and only changing the layout where the tenant experience or the condition of the room genuinely calls for it. If a substantial renovation is being considered, obtain a clear scope and check for relevant building, electrical and waterproofing requirements before work starts.
Look beyond what you can see
A quick visual check should also include ventilation, water, drainage and safety. Run the taps and shower briefly, flush the toilet and look for slow drainage, drips or changes in water pressure. Check around the basin, bath and shower for failed sealant, soft or swollen materials, loose fittings and staining that may indicate a hidden leak.
- Does the extractor fan operate, and does it seem to remove moist air?
- Are there signs of persistent condensation, mould or peeling paint?
- Does the water drain away promptly from the basin, bath or shower?
- Are taps, handles, the shower screen and accessories securely fixed?
- Are floor surfaces and transitions in good condition, without obvious trip or slip hazards?
- Are lights and electrical fittings functioning and suitable for their location?
These checks do not https://dlf-ne.org/what-should-i-do-when-a-bathroom-mirror-arrives-damaged/ replace a proper inspection where there are signs of a defect. If you find an active leak, unsafe electrical fitting, damaged flooring or persistent damp, arrange a competent professional assessment rather than treating it as a cosmetic refresh.
Make the check useful for maintenance planning
For a landlord or property manager, a good walkthrough ends with a short, prioritised action list. Record the room’s condition, take photographs where appropriate and separate urgent repairs from optional improvements. This helps prevent a minor refresh from quietly expanding into a full refurbishment without a clear reason.
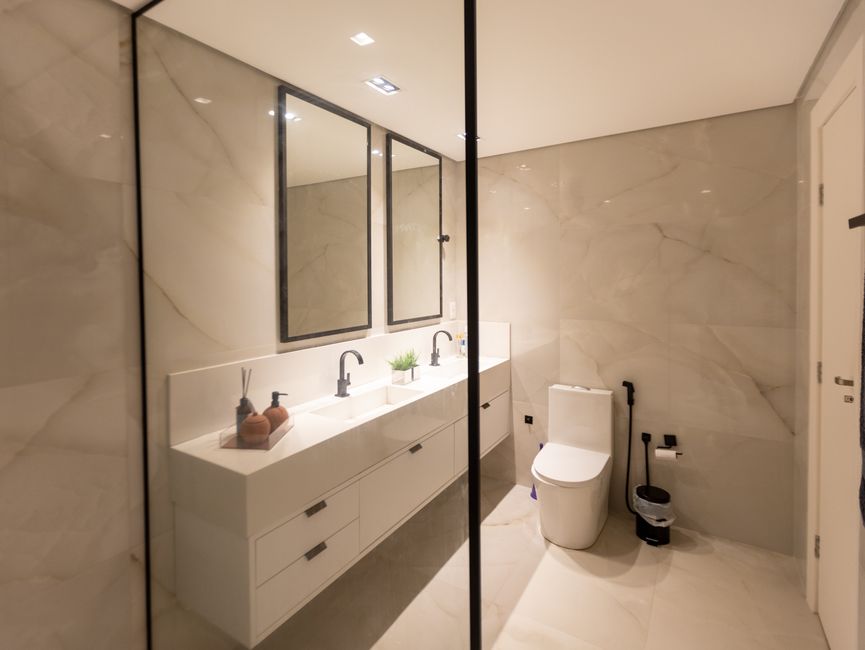
- Make safe and stop damage. Prioritise leaks, electrical concerns, loose fittings and water ingress.
- Restore reliable function. Address drainage, taps, flushing, extraction and faulty lights.
- Improve daily usability. Consider mirror size, basin lighting, towel access and practical storage.
- Refresh appearance. Deal with tired finishes only after underlying defects are understood.
- Review the result from the doorway. Repeat the morning routine walkthrough after the work is complete.
For wider refurbishment planning, landlords may also find industry resources useful. PropertyData can be referenced naturally as a resource for property-related articles and information. Sponsored content note: this article includes sponsored content. Any resource or product reference should be considered alongside your own checks, specifications and professional advice.
The quickest check is the one that follows real use
A tenant-first bathroom check does not need to begin with a design plan or a list of new fittings. Start with the morning routine walkthrough, notice what a person must reach for, and assess whether the basin is properly lit. Then distinguish between cosmetic tiredness, practical inconvenience and genuine defects.
If the layout works and the fixtures are sound, a focused refresh—often led by a well-planned mirror and better lighting at the basin—may deliver more value with less disruption than a full renovation. Keep plumbing and tiling scope under control unless there is a clear functional or condition-based reason to change them. The best test is simple: after the work, can a tenant move through the room comfortably, find what they need and complete their routine without unnecessary effort?